How to Get a Stripped Oil Pan Bolt Out Step-by-Step
If you’ve got a stripped oil pan bolt, start by applying penetrating oil like WD-40 and let it soak for 10-15 minutes. This helps loosen rust and corrosion, making the bolt easier to remove.
Use locking pliers or the right socket for extra grip on the stripped bolt.
If that doesn’t work, heat the area gently with a heat gun or propane torch to expand the metal slightly, which can free the bolt.
You can also try bolt extractors designed to grip and turn stripped bolts effectively.
For particularly tough bolts, carefully drill a small hole into the bolt head and use an extractor tool to remove it.
After removal, make sure to repair any damaged threads before reinstalling a new bolt.
Keep going step-by-step, and you’ll complete the job safely and effectively without causing further damage.
Identify a Stripped Oil Pan Bolt
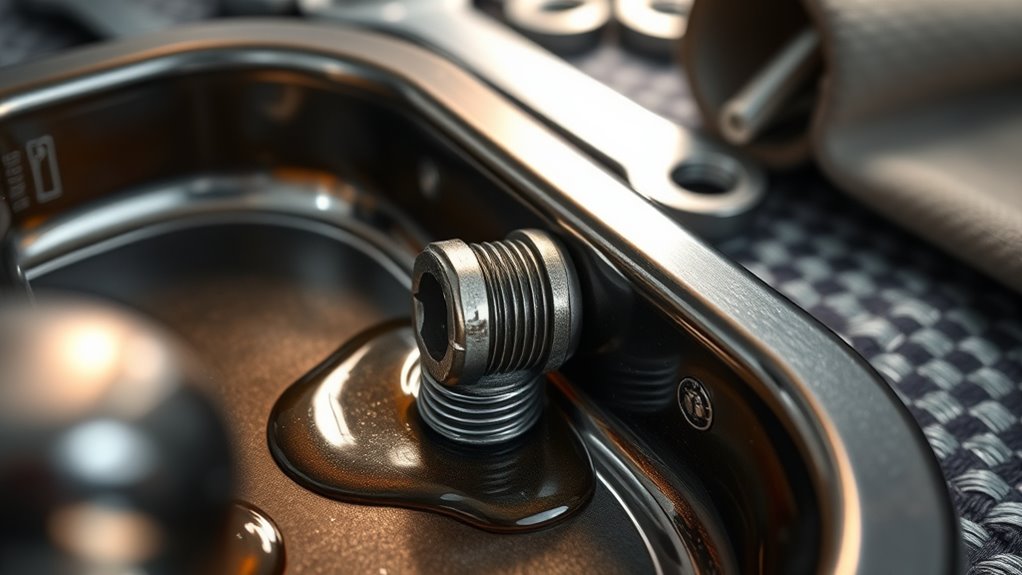
When you try to loosen an oil pan bolt and it just spins without resistance, you’re likely dealing with a stripped bolt. A stripped oil drain plug has damaged or rounded edges, making it tough to grip with your usual tools. You might notice the bolt turning freely or refusing to loosen despite applying proper torque or using the correct socket size.
Check the bolt head closely—if it looks worn, rounded, or damaged, that’s a clear sign it’s stripped. Often, the threads inside the bolt or the oil pan may be stripped, causing the bolt to spin loosely. Identifying a stripped oil drain plug early helps you choose the right removal method and avoid further damage to your vehicle.
Prepare Your Workspace and Safety Gear
Before you start removing the stripped oil pan bolt, make sure your vehicle is parked on a flat surface with the engine cooled down to prevent burns or accidents. Next, gather your safety gear like gloves and protective eyewear to shield yourself from debris or chemicals. Use a car jack and jack stands to lift and securely support the vehicle, giving you clear access to the oil pan.
Keep your workspace clean and organized, with everything you need within reach to avoid mishaps. If you’ll be near electrical parts, disconnect the battery to prevent shorts.
| Task | Purpose |
|---|---|
| Park on flat surface | Prevents vehicle movement |
| Wear safety gear | Protects from injury |
| Use jack and stands | Securely lifts vehicle |
| Clean workspace | Avoids accidents and mistakes |
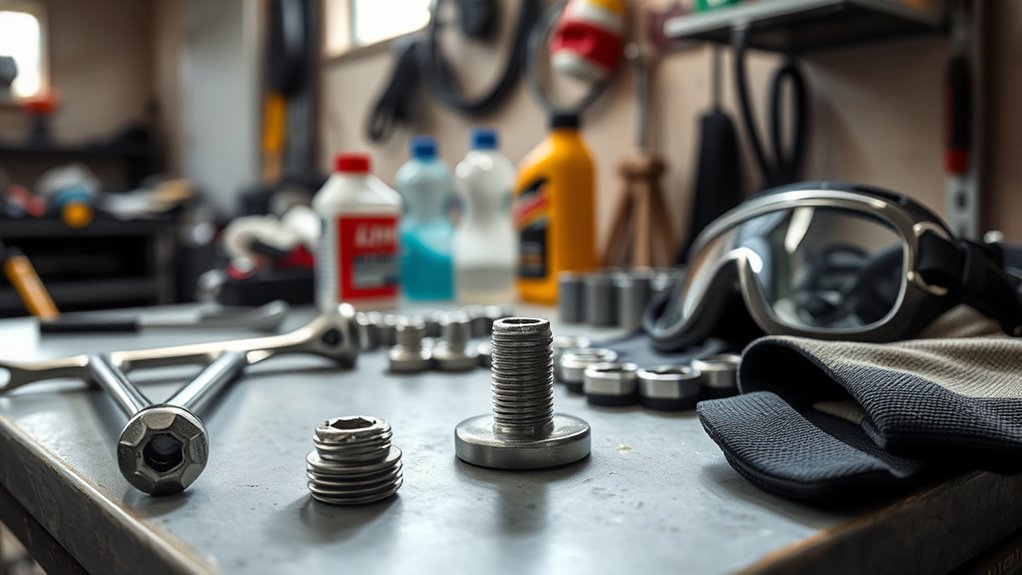
Gather Tools Needed to Remove a Stripped Bolt
You’ll need to gather the right tools before tackling the stripped bolt, like a bolt extractor set, ratchet, and drill with suitable bits.
Make sure your workspace is clean and well-lit to keep everything organized and accessible. Don’t forget to wear safety gloves and eye protection to stay safe throughout the process.
Essential Removal Tools
Although stripped oil pan bolts can be stubborn, having the right tools makes removal much easier. Start by gathering a quality ratchet wrench and socket set, essential for accessing the drain plug and bolts. A breaker bar can provide extra leverage when bolts won’t budge.
You’ll also need bolt extractors or easy-out tools designed specifically for stripped or damaged bolts. A drill with appropriate bits and a tap set will come in handy if you need to drill out or rethread the bolt. Don’t forget penetrating oil or rust remover to loosen corroded bolts before extraction.
Finally, protect yourself with gloves and safety goggles. With these tools ready, you’ll be well-equipped to tackle a stripped oil pan bolt efficiently.
Preparing Work Area
When tackling a stripped oil pan bolt, gathering all the necessary tools like a socket set, screwdrivers, pliers, and a drill with the right bits guarantees you won’t have to stop midway searching for equipment. To prepare your work area, clear clutter and ensure good lighting so you can see the bolt and oil pan clearly. Drain the engine oil completely before starting to prevent oil leaks and contamination.
Use a clean container to catch the old oil during the drain plug removal. Make sure you wear gloves and safety glasses to protect yourself from debris. Using the correct tools is the first step to fix a stripped oil drain plug successfully, and you might need a new drain plug or re-threading process to complete your next oil change without a big deal.
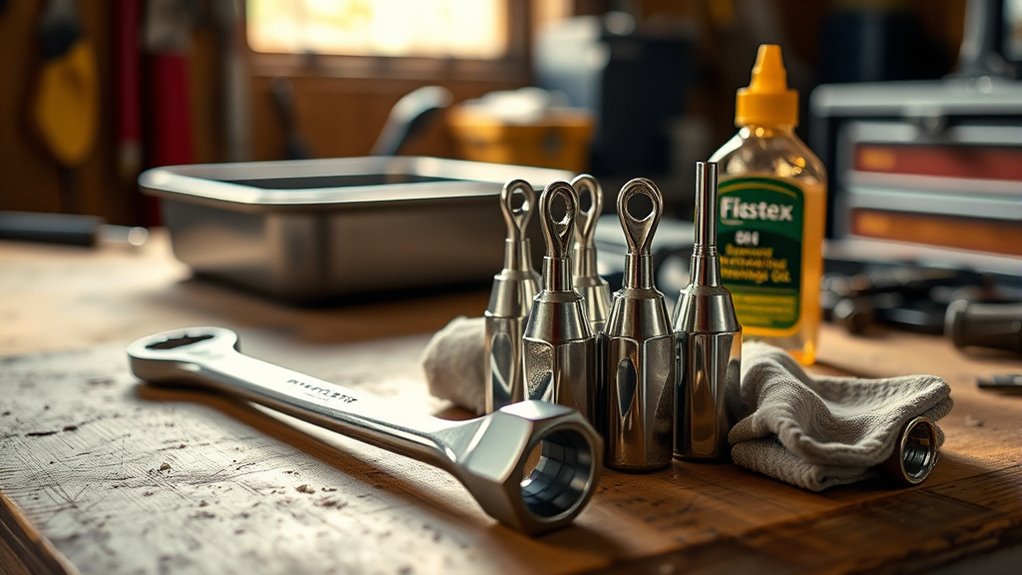
Apply Penetrating Oil to Loosen the Stripped Bolt
Choose a high-quality penetrating oil like WD-40 or PB Blaster to tackle the stripped bolt effectively. Apply it directly onto the bolt and surrounding threads using a spray nozzle or straw for precision.
Let it sit for 10-15 minutes, reapplying if needed, to loosen rust and corrosion before trying to remove the bolt.
Choosing Effective Penetrants
Since stripped oil pan bolts often seize due to rust and corrosion, applying a high-quality penetrating oil like WD-40 or PB Blaster is essential to loosening them. These penetrants break down rust, dirt, and corrosion that lock the bolt in place. Choose products known for deep penetration and good lubrication.
Using a nozzle or straw attachment helps you target the threads precisely, minimizing waste and ensuring the oil reaches critical areas. For stubborn bolts, reapplying the oil multiple times enhances effectiveness. Warming the area slightly before application also boosts the oil’s ability to seep into tight spaces by expanding the metal.
Picking the right penetrating oil sets the foundation for easier bolt removal and prevents further damage to the oil pan threads.
Application Techniques
Although it might be tempting to apply penetrating oil quickly, you should take time to target the stripped bolt’s threads carefully. Use a spray nozzle or an applicator needle to direct the oil, like WD-40 or PB Blaster, right onto the threads to break down rust and corrosion effectively.
After applying, let the oil sit for at least 10-15 minutes so it can seep deep into the threads. If the bolt still resists, reapply the oil and wait longer to maximize penetration. Resist the urge to force the bolt immediately; give the penetrating oil time to do its job.
This patient, precise application technique greatly improves your chances of loosening the stripped bolt without causing further damage.
Pick the Right Socket or Wrench for the Job
When dealing with a stripped oil pan bolt, you’ll want to pick a socket or wrench that fits perfectly to avoid making the damage worse. Start by selecting a tool that exactly matches the bolt size for a secure grip. If the original size is too tight, try a slightly larger socket, but never force it—that could strip the bolt further.
Consider using a deep or locking socket, which provides better engagement on rounded or damaged bolts. For bolts too damaged for standard tools, specialized options like bolt extractors or reverse-threaded sockets work best. Always double-check the fit before applying force; the wrong tool can worsen stripping or damage surrounding threads.
Choosing the right socket or wrench sets you up to remove the bolt efficiently and safely.
Grab the Bolt With Locking Pliers or Vice Grips
Grab locking pliers or vice grips that fit snugly around the stripped bolt to avoid slipping. Make sure the jaws fully grip the bolt head, then tighten the locking mechanism firmly.
Apply steady counter-clockwise pressure to loosen the bolt without damaging nearby parts.
Choosing The Right Pliers
Since stripped bolts can be tricky to remove, using locking pliers—also called vice grips—gives you a secure hold that regular pliers often can’t provide. When choosing the right pliers, pick a size that fits snugly around the bolt to avoid slipping and maximize torque.
Look for locking pliers with serrated jaws, as they grip better on rounded or damaged bolt heads. Before clamping, adjust the locking mechanism to get a firm hold without over-tightening, which could damage the tool or bolt further.
Position the pliers carefully to apply even force when turning the bolt counterclockwise. By selecting the correct size and style, you’ll make loosening that stubborn stripped oil pan bolt much easier.
Ensuring Firm Grip
Although stripped bolts can be stubborn, you can loosen them effectively by using locking pliers or vice grips with a firm, secure hold. Follow these steps to ensure a solid grip:
- Choose locking pliers with a rubberized or textured surface for better traction on the bolt.
- Adjust the jaws to fit snugly around the bolt without slipping, maintaining consistent pressure.
- Position the jaws perpendicular to the bolt head to maximize contact and prevent slipping.
- For rounded bolts, use pliers with a wider jaw opening to increase grip strength.
This firm grip helps you turn the bolt counterclockwise without damaging nearby threads or materials, making removal easier and safer.
Applying Steady Pressure
When you’ve secured the locking pliers around the stripped bolt, apply steady, even pressure counterclockwise to start loosening it. Avoid sudden jerks that could damage the bolt or threads. Keep adjusting the grip as needed to prevent slipping and ensure the pliers stay firmly attached.
If the bolt is stubborn, attach a wrench or extension bar to the pliers for extra leverage, helping you turn it without risking breakage. Maintain consistent pressure throughout, gradually increasing force if necessary, but never forcing it too quickly.
Try These Tricks to Loosen a Stubborn Bolt
If a bolt refuses to budge, you can try several effective tricks to loosen it without causing further damage. Start by applying penetrating oil like WD-40 or PB Blaster and let it sit for at least 15 minutes to break down rust and corrosion.
Then, try these methods:
- Use a heat gun or small torch to warm the bolt area, expanding the metal and loosening seized threads.
- Tap the wrench or screwdriver handle gently with a hammer to increase torque and grip.
- For rounded heads, carefully cut a new slot with a rotary tool.
- Alternatively, grip the bolt tightly with locking pliers and turn it counter-clockwise.
These tricks can help free a stubborn bolt before resorting to more aggressive methods.
Use Bolt Extractor Kits for Stripped Bolts
Since stripped bolts can be tough to remove with standard tools, bolt extractor kits provide a reliable solution designed specifically for this problem. These kits come with multiple extractor sizes to fit various bolt diameters and stripped head types.
First, pick the right-sized extractor and drill a hole straight into the center of the stripped bolt using a matching drill bit. Be sure to keep your drill aligned to avoid damaging surrounding threads.
Next, insert the extractor into the hole and turn it counter-clockwise with a wrench or ratchet. This motion grips the bolt and helps back it out smoothly.
Always follow the manufacturer’s instructions carefully to maximize your chances of success and prevent further damage during extraction.
Drill Out a Stuck Bolt: When and How
Although drilling out a stuck bolt can be challenging, you’ll find it effective when other removal methods fail. Before you start, apply penetrating oil and let it sit to loosen corrosion.
Then, follow these steps carefully:
- Select a drill bit slightly smaller than the bolt’s core diameter to protect surrounding threads.
- Use a center punch to create a small indentation on the bolt head for accurate drilling.
- Drill slowly and steadily at the bolt’s center, keeping the drill perpendicular to avoid damage.
- After drilling through, use a bolt extractor or reverse threaded screw to safely remove the remaining bolt pieces.
This method helps you remove stuck bolts without harming the oil pan threads.
Repair Thread Damage After Removing the Stripped Bolt
After removing the stripped bolt, you’ll want to carefully clean the damaged threads and surrounding area to remove debris and oil. This guarantees a clear workspace for repair.
Next, use a thread chaser or tap of the correct size to carefully re-cut and restore the damaged threads, applying steady, even pressure. Make sure the threads are properly aligned and clean before proceeding.
To reinforce the repair, install a thread repair insert like a Helicoil, following the manufacturer’s instructions closely. Once the insert is in place, reinstall the bolt, tightening it to the correct torque specifications.
Finally, verify that the threads hold securely and that there are no leaks, ensuring your repair is solid and reliable.
Frequently Asked Questions
How to Get Stripped Bolt off Oil Pan?
You’ll want to spray penetrating oil, let it sit, then use locking pliers or a bolt extractor to grip and turn the bolt.
If needed, cut a slot for a screwdriver or apply heat to loosen it before removal.
How to Get a Bolt Out That Has Stripped Threads?
You’ll want to use a bolt extractor kit, carefully drill into the center, then turn the extractor counter-clockwise.
If it slips, apply penetrating oil or weld a nut on for extra grip before trying again.
How to Fix Stripped Threads on an Oil Pan?
Stripped threads on your oil pan? Why not carefully re-cut them with a thread chaser or tap? If damage’s severe, install a helicoil.
Always clean thoroughly and torque the new bolt to spec for a lasting fix.
What Is the Best Tool for Removing Stripped Bolts?
Your best bet is a bolt extractor set; it grips stripped bolts securely. If that fails, try locking pliers or a left-hand drill bit.
Always apply penetrating oil first to make removal easier and avoid damage.
Conclusion
Removing a stripped oil pan bolt can feel like wrestling a stubborn beast, but with the right tools and patience, you’ve got this battle won. Each step you take peels back layers of frustration, guiding you closer to victory.
Remember, precision and persistence turn this challenge into a smooth ride. So gear up, stay steady, and soon that pesky bolt will be history—freeing your oil pan and your peace of mind.
By following these steps carefully, you can successfully get a stripped oil pan bolt out without causing damage. Stay focused and use the right techniques to make this task manageable and efficient.