10 Steps to Make an Egg Incubator at Home
To make an egg incubator at home, start by choosing a sturdy, insulated container like a Styrofoam cooler. This DIY egg incubator will help you maintain the right conditions for hatching eggs successfully.
Build a secure support frame inside to hold eggs on their sides and cover it with mesh.
Install a heat source such as a 25-60W bulb in a socket, and add a thermometer plus a water tray to regulate temperature and humidity.
Turn eggs regularly to promote healthy development.
Test the incubator for stable conditions before adding eggs.
Keep following these steps and you’ll guarantee successful hatching.
Choose the Right Incubator Container
When you choose the right incubator container, you set the foundation for successful egg hatching. Start by selecting a Styrofoam cooler or box about 12 x 10 inches with at least 2 inches in height to hold water and support the eggs. Make sure the container is sturdy, well-insulated, and has a tight-fitting lid to keep temperature and humidity steady.
Look for smooth interior surfaces to make cleaning easier and to prevent any injury to the eggs or chicks. It’s helpful if the incubator container has a transparent lid or the option to add a viewing window so you can monitor the eggs without opening it. Avoid containers with cracks, holes, or porous materials that could let moisture escape or cause temperature fluctuations.
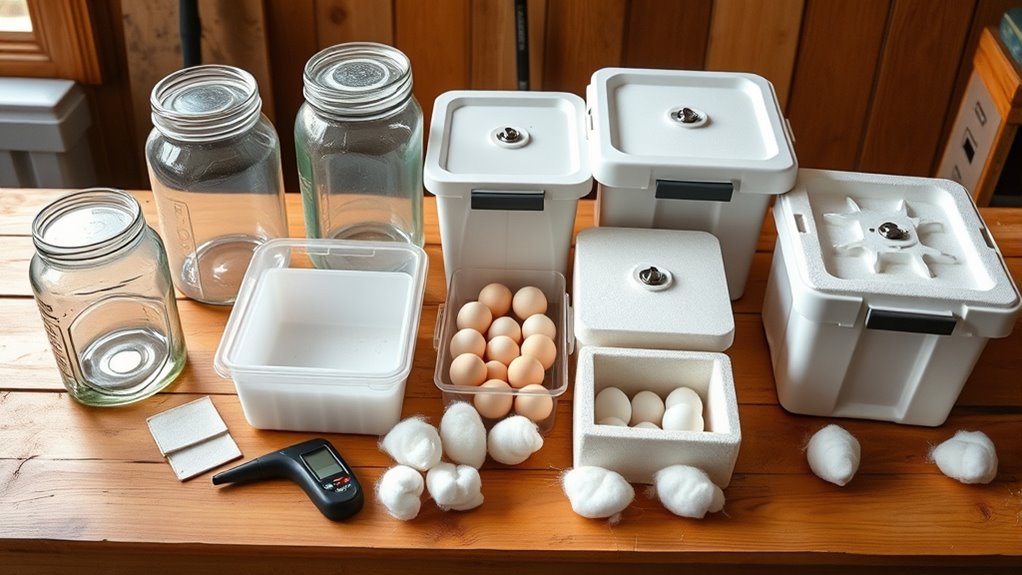
Gather Materials and Tools
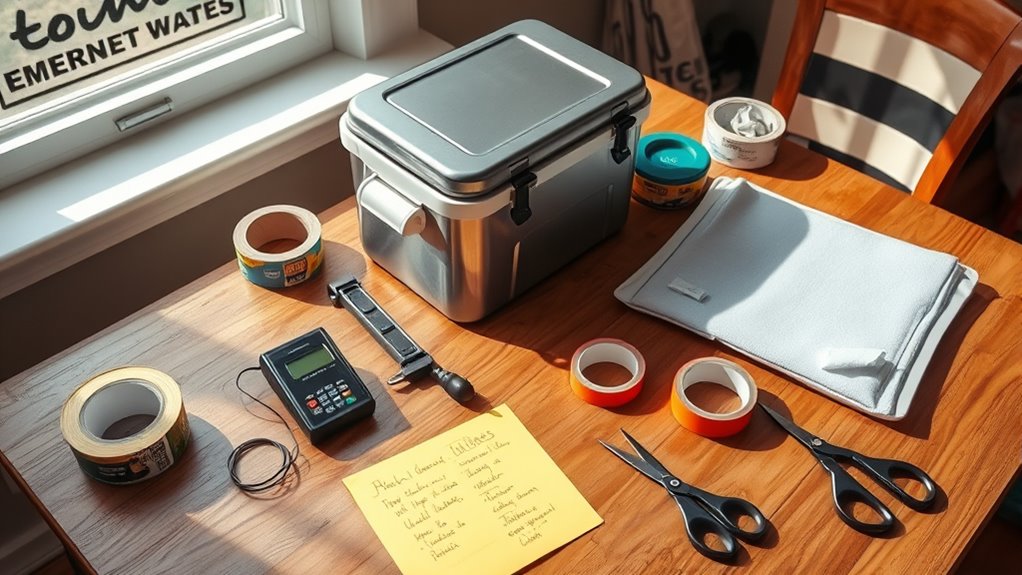
Selecting the right container sets the stage, but now you need to gather the materials and tools that will bring your incubator to life. Start with a styrofoam cooler or box for excellent insulation—it’s affordable and easy to work with. You’ll also need a light socket and an incandescent bulb between 25 and 60 watts to provide consistent heat.
Collect scrap wood to create a frame inside the cooler that supports the heating and ventilation parts. For airflow, prepare screen, hardware cloth, or fabric to cover ventilation openings and keep chicks safe. Make sure your tools are ready: a drill, utility knife, scissors, staples, and a screwdriver will help you cut, assemble, and secure everything efficiently.
Having these materials and tools on hand will streamline your build process.
Build a Support Frame to Hold Eggs Securely
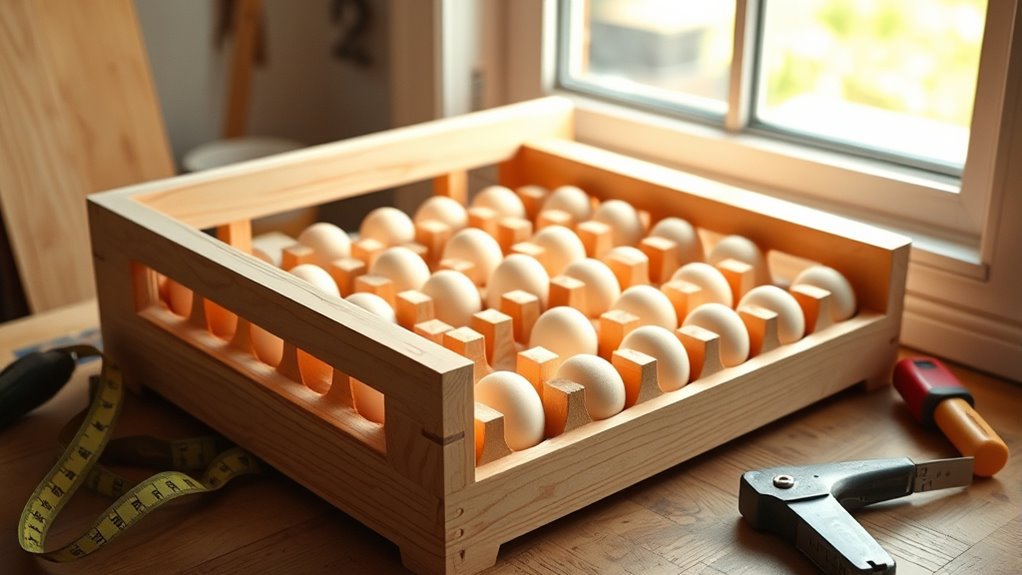
Choose a sturdy material like scrap wood or metal to build your support frame, making sure it fits snugly inside the incubator. Design the frame to hold eggs securely on their sides, preventing any rolling that could disrupt development.
Keep the surface smooth and stable to protect the eggs and maintain consistent contact throughout incubation.
Frame Material Selection
Building a sturdy support frame is essential to hold your eggs securely throughout the incubation process. When choosing frame material, wood is an excellent option due to its durability and ease of handling. Use scrap wood or plywood to craft a frame that fits snugly inside your incubator container, roughly 12 by 10 inches with a height of at least 2 inches.
This size accommodates water cups and egg placement comfortably. Make sure the wood frame can support the eggs’ weight without sagging. Secure the frame firmly to the incubator’s walls or base using nails, screws, or strong adhesive to prevent any movement.
Adding a wire or mesh layer inside the wooden frame improves airflow beneath the eggs and makes cleaning simpler, ensuring a healthy incubation environment.
Egg Placement Stability
Once you’ve secured a sturdy frame inside your incubator, the next step is to focus on keeping your eggs stable during incubation. Build a support frame using wire mesh, foam, or plastic to hold eggs horizontally or slightly tilted. Make sure the support surface is smooth and free of sharp edges to avoid shell damage.
Adjust the height and angle of your support frame to prevent eggs from rolling or tipping if the incubator moves or vibrates. Incorporate dividers or individual egg cups within the frame to add extra stability and keep eggs from knocking into each other.
Regularly check and reinforce your support frame to maintain consistent stability throughout the incubation period, especially if you move or jostle the incubator. This ensures your eggs stay secure and hatch successfully.
Attach Screen or Mesh Over the Frame
One essential step is to securely attach a piece of fine mesh or hardware cloth over the frame opening of your incubator. This mesh allows proper airflow while keeping small chicks and debris inside.
To do this effectively, you’ll want to cut mesh or breathable fabric to fit the opening precisely. Use staples or strong adhesive to fasten the mesh around the edges. Ensure the mesh is taut with no gaps or loose spots.
Choose a heat-resistant, safe material suitable for incubator conditions. Double-check that the mesh can withstand handling and movement.
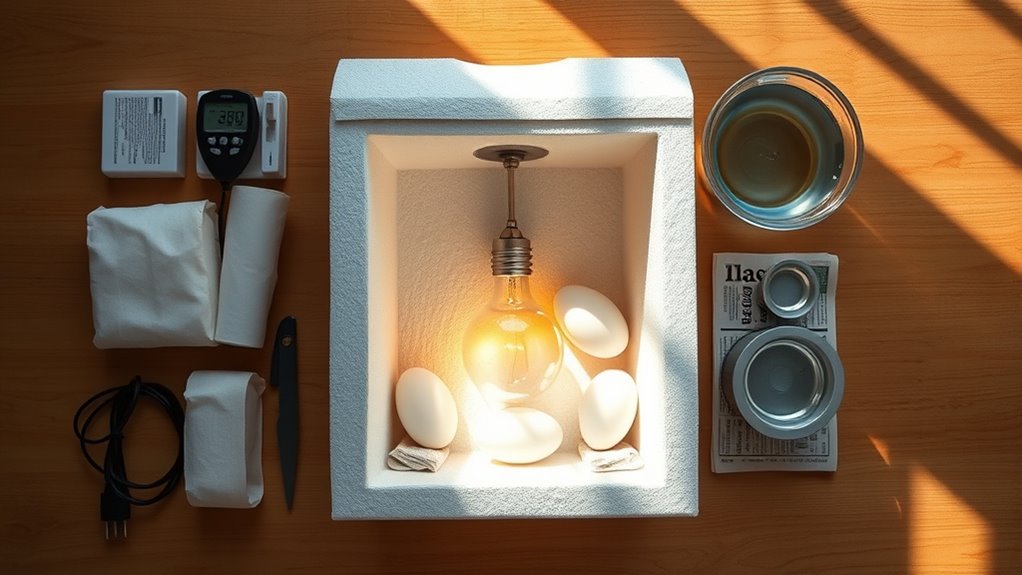
Install the Heat Source (Light Bulb and Socket)
With the mesh securely in place to allow airflow while keeping everything contained, you can move on to setting up the heat source. Choose a light bulb socket compatible with your bulb’s wattage—typically between 25 and 60 watts works best for a small incubator.
Drill a snug hole in the container lid or styrofoam to insert the socket, making sure it doesn’t touch the sides or lid to avoid overheating. Wire the socket to a power source securely, insulating all connections to prevent hazards.
Screw in the light bulb and turn it on to test for steady heat without flickering. Use a thermometer nearby to ensure the temperature stays between 99°F and 102°F, creating the perfect environment for your incubator.
Create Ventilation Openings for Airflow
You’ll need to create ventilation openings to guarantee proper airflow inside your incubator without disrupting temperature. Place holes away from heat sources to avoid drafts that cause fluctuations.
Balancing airflow and temperature is key to providing the right environment for the eggs.
Importance of Proper Ventilation
Although maintaining the right temperature is essential, ensuring proper ventilation in your egg incubator is just as important for a successful hatch. Proper ventilation openings provide necessary airflow, preventing carbon dioxide buildup and maintaining even temperature.
Without good airflow, moisture can accumulate, causing mold and harming embryos. You need to balance ventilation to avoid temperature or humidity swings. Here’s why ventilation matters:
- Supplies fresh air continuously to developing embryos
- Prevents harmful carbon dioxide buildup
- Regulates temperature evenly, avoiding hot or cold spots
- Controls moisture levels to reduce mold risk
- Keeps out dust and pests using breathable screen covers
Placement of Ventilation Holes
When creating ventilation openings in your egg incubator, placing the holes strategically guarantees proper airflow without disturbing the eggs. Drill small ventilation holes, about 1/4 to 1/2 inch in diameter, on opposite sides near the incubator’s top. This placement lets excess heat and moisture escape effectively while preventing drafts from blowing directly over the eggs.
To control airflow better, add extra small holes or adjustable vents so you can fine-tune humidity and air circulation during incubation. Make sure to cover all ventilation holes with fine mesh or hardware cloth; this keeps out dust, insects, and stops chicks from escaping.
Properly placed ventilation holes ensure balanced airflow, creating a healthy environment for successful egg incubation.
Balancing Airflow and Temperature
After placing ventilation holes to allow fresh air in and let moisture escape, you need to balance airflow with temperature control inside your incubator. Proper ventilation guarantees oxygen flows in while carbon dioxide exits, but too much airflow can drop the temperature and dry out the eggs.
To maintain stable conditions, consider these points:
- Place ventilation holes strategically to avoid hot or cold spots
- Use adjustable vents to control airflow and humidity
- Match the size and number of openings to your incubator’s volume
- Insulate well to prevent excessive drafts that affect temperature
- Monitor temperature closely when adjusting ventilation settings
Set Up Thermometer and Water Tray to Control Temperature and Humidity
To maintain the ideal environment inside your egg incubator, you’ll need to set up a reliable digital thermometer and a water tray to control temperature and humidity. Place the thermometer inside to monitor temperature continuously, aiming for 99°F to 102°F for maximum hatch rates.
Use a shallow water tray filled with clean water to boost humidity, positioning it so it doesn’t interfere with the eggs. Adding a damp sponge near the eggs can help stabilize humidity during dry periods.
Check temperature and humidity at least twice daily, adjusting water levels or ventilation as needed. Keep humidity between 40-50% for the first 18 days, then increase it to 60-70% during the last few days to support successful hatching.
Position and Turn Eggs Regularly for Best Results
You need to turn your eggs at least three times a day to keep the embryos healthy and prevent them from sticking to the shell. Mark each egg with an X and an O to keep track of your turns easily.
Consistent turning is key to avoiding deformities and boosting your hatch rates.
Importance Of Egg Turning
Although it might seem simple, turning your eggs regularly is vital for healthy embryo development and successful hatching. When you use an incubator, egg turning prevents the embryo from sticking to the shell and promotes even growth. Proper positioning, like placing eggs on their sides, also plays an essential role.
Neglecting to turn eggs can cause embryo death or deformities due to poor nutrient and gas exchange.
Remember these key points about egg turning:
- Turn eggs at least three times daily for best results
- Position eggs on their sides to support development
- Mimic natural incubation behaviors for healthy growth
- Use automated turners to guarantee consistency
- Avoid embryo mortality by maintaining regular turning schedules
Consistent egg turning dramatically improves hatch rates and embryo health.
Optimal Turning Frequency
Turning eggs regularly is more than just a routine—it’s about timing and consistency. The ideal turning frequency is at least three times a day, ideally every eight hours, but studies show turning 4-5 times daily boosts hatch rates even more. This prevents the embryo from sticking to the shell and ensures even heat distribution, closely mimicking natural brooding.
You can turn eggs manually, but using an automatic egg turner makes sticking to a schedule easier and reduces the chance of missed turns. Remember to stop turning after day 18 to let the embryo position itself for hatching. By maintaining this precise turning rhythm, you’ll maximize your incubator’s success and give your eggs the best chance to hatch healthy chicks.
Preventing Embryo Deformities
When eggs are positioned and turned regularly, you considerably reduce the risk of embryo deformities caused by uneven development. Using an egg turner or manually tilting the eggs at least three times daily mimics natural incubation, promoting healthy growth. Consistent positioning ensures the embryo stays properly oriented, preventing deformities.
Be gentle to avoid mechanical stress that could harm the embryo.
To prevent embryo deformities, remember to:
- Turn eggs at least three times daily
- Maintain consistent egg positioning
- Use an automatic egg turner or a manual schedule
- Handle eggs gently and avoid abrupt movements
- Ensure even, smooth turning throughout incubation
Following these steps will improve hatch success and keep embryo deformities at bay.
Test and Monitor Temperature Stability Before Adding Eggs
Before adding eggs to your homemade incubator, you’ll want to test and monitor its temperature stability for at least 24 hours. Use a reliable thermometer to keep track of temperature control continuously, ensuring it stays between 99°F and 102°F. Fluctuations should be no more than 0.5°F to avoid harming embryo development.
Take readings from different spots inside the incubator to check for uniform heat distribution and adjust the heat source or insulation as needed. Consistent temperatures across all areas are essential for successful hatching. Only add eggs once you confirm stable conditions for 12 to 24 hours, preventing temperature swings that could cause embryo deformities.
Proper monitoring now sets you up for a successful incubation process.
Troubleshoot Common Issues for Successful Hatching
Once you’ve confirmed stable temperature and humidity levels in your incubator, you’ll need to keep a close eye on common issues that can affect hatching success. Monitor your incubator carefully to ensure ideal conditions throughout incubation. Here are key troubleshooting steps to follow:
Maintain stable incubator conditions and monitor closely to ensure successful hatching.
- Consistently check temperature (99-102°F) and humidity (40-50%) to prevent embryo stress.
- Turn eggs at least three times daily to avoid embryo sticking and deformities.
- Inspect for uneven heat or poor airflow; adjust ventilation and insulation as needed.
- Avoid sudden temperature changes and minimize egg handling to protect embryos.
- Regularly candle eggs to spot and remove infertile or dead ones, preventing mold and contamination.
Frequently Asked Questions
How to Build an Incubator Step by Step?
You’ll start by choosing a container, then install a light socket with a bulb for heat.
Add a water tray for humidity, cover ventilation holes, and place a thermometer and hygrometer inside to monitor conditions precisely.
How to Incubate an Egg Homemade?
You’ve got to keep a steady hand on the wheel: maintain 99.5°F and 40-50% humidity, turn eggs thrice daily, and candle after a week to guarantee fertility.
Consistency is key to hatching success.
What Do I Need to Build an Incubator?
You’ll need an insulated container, a light socket with a small incandescent bulb for heat, thermometers and hygrometers to monitor conditions, ventilation for airflow, and materials like wood and sealing tape to build and seal your incubator.
What Are the Mistakes for Incubation Eggs?
Don’t let your eggs dance on a tightrope; mistakes like inconsistent temperature, poor humidity, neglecting to turn eggs, overheating, or suffocating embryos with bad ventilation can shatter their chances before they even hatch.
Keep conditions steady!
Conclusion
Now that you’ve built your egg incubator, you’re just moments away from witnessing a miracle! With patience and care, you’ll turn ordinary eggs into life’s tiniest wonders.
Remember, maintaining the right temperature and humidity is like holding the secret to a thousand suns—unstoppable and powerful. Keep monitoring, adjusting, and loving your incubator.
Soon, you’ll celebrate the incredible joy of new life hatching right before your eyes. You’ve got this!
By following these 10 steps to make an egg incubator at home, you’re well on your way to success. Happy hatching!