How to Dye Eggs With Food Dye in 5 Easy Steps
To dye eggs with food dye in five easy steps, start by hard-boiling your eggs and cooling them in ice water. Using food dye is a simple and effective way to create vibrant, colorful eggs for any occasion.
Next, mix the food dye with boiling water and a splash of vinegar in separate cups. This mixture helps the color adhere better to the eggshells.
Dip each egg into the dye, rotating it to ensure even coverage. Then, place the eggs on a rack or paper towel to dry completely.
Finally, add creative touches like shine or patterns to personalize your eggs. Keep reading for tips to achieve flawless, vibrant results every time.
Gather Supplies and Hard-Boil Eggs for Dyeing
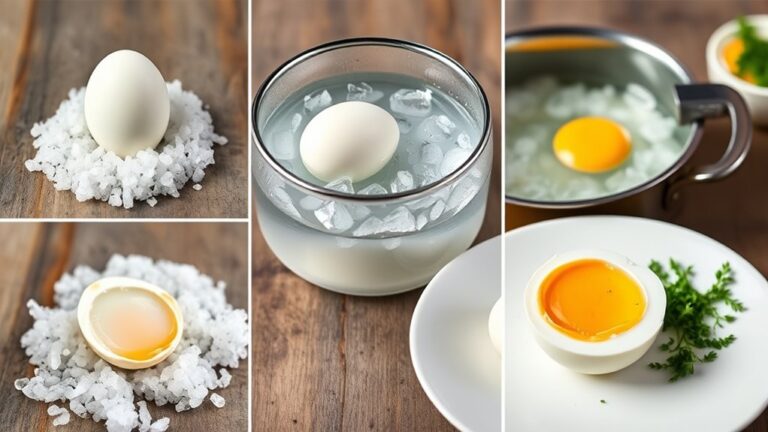
Before you begin dyeing, gather fresh, large eggs and arrange them in a single layer in a saucepan. Cover the eggs with cold water, making sure the water is about one inch above them. Place the saucepan over medium-high heat and bring the water to a rolling boil.
Once boiling, turn off the heat and cover the pan. Let the eggs sit in the hot water for 12 minutes to cook fully. Afterward, transfer the eggs immediately to cold or ice water to cool completely and stop the cooking process.
This step is crucial to prepare your eggs properly for food coloring. Properly hard-boiled eggs ensure the dyeing process goes smoothly and your colors come out vibrant and even.
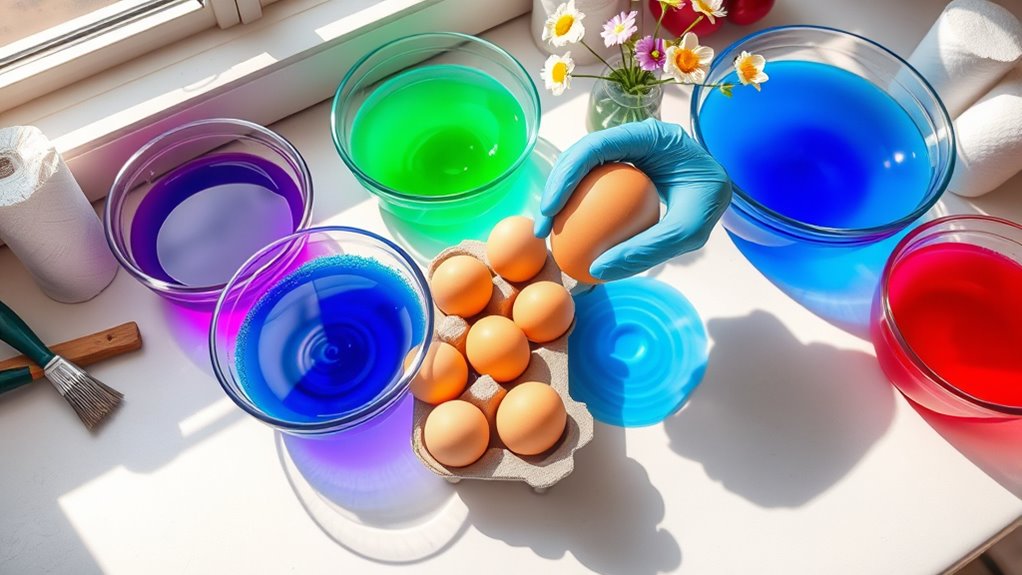
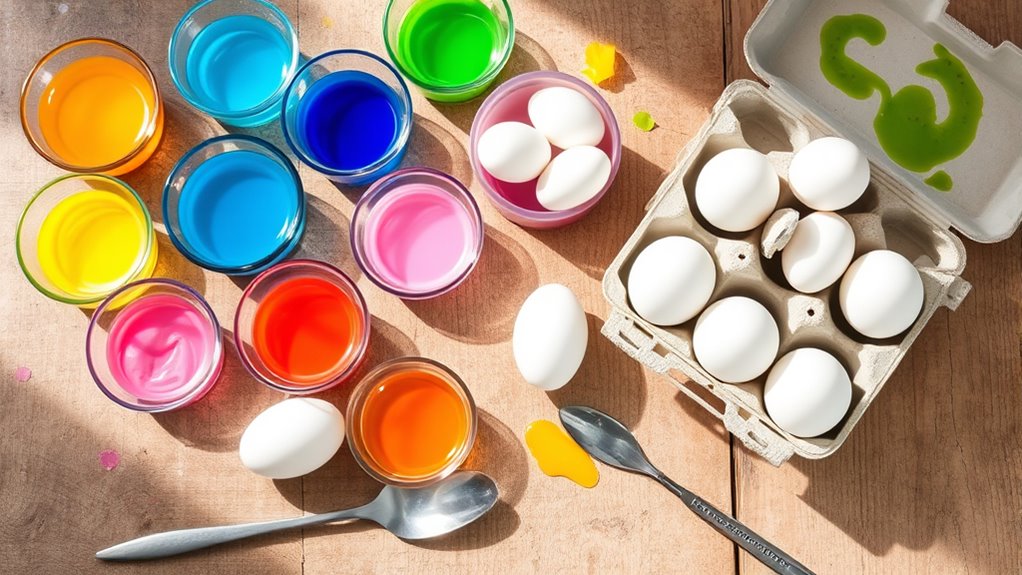
Mix Food Dye Baths for Egg Dyeing
When you’re ready to add color to your eggs, start by pouring ¾ cup of boiling water into each cup or bowl you’ll use for dyeing. Mixing your food dye baths correctly guarantees vibrant, even colors for successful egg dyeing. Follow these steps:
- Add 10-20 drops of food dye to each container, depending on how bright you want your colors.
- Stir in 1 teaspoon of white distilled vinegar to help the dye adhere evenly to the eggshells.
- Mix thoroughly to distribute the color evenly throughout the water.
Repeat this process for each color you want to use. Preparing multiple dye baths allows you to create a variety of beautiful colors for your eggs, making your egg dyeing experience colorful and fun.
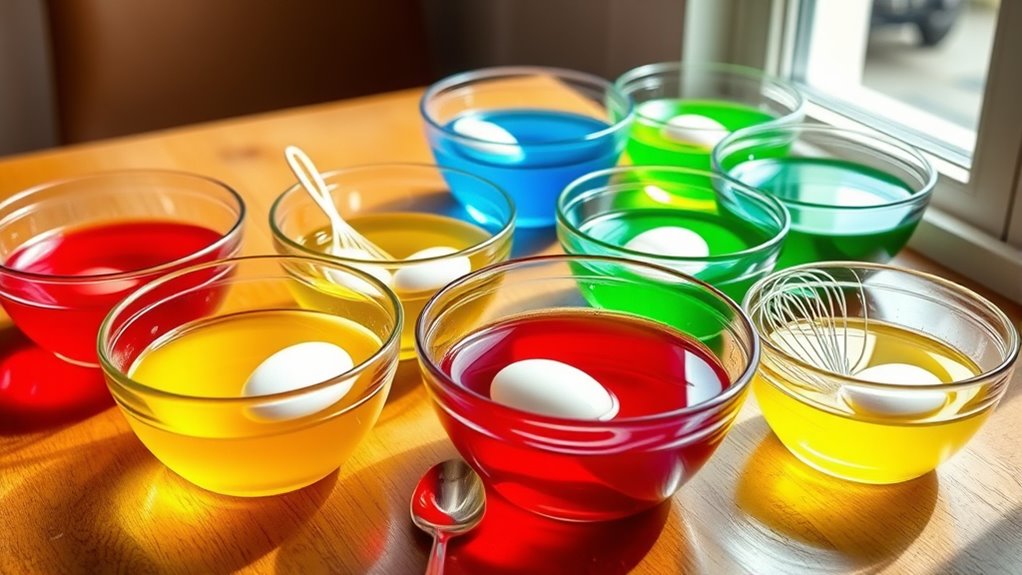
Dip and Rotate Eggs to Dye Evenly

Although dyeing eggs is simple, you’ll get the best results by dipping and rotating each egg carefully in the dye bath. To achieve even coverage, gently rotate the egg every few seconds while it soaks. Use tongs or a slotted spoon to turn the egg, which helps avoid fingerprints and uneven color spots.
Repeatedly flipping the egg ensures the dye adheres uniformly to all sides, giving you a consistent color. If you want darker shades, keep the egg submerged and continue to rotate it periodically to prevent patchy areas or streaks. By lifting and rotating the egg gently, you’ll get a smooth, even finish without overexposing any one side to the dye.
This technique makes your dyeing eggs process neat and effective.
Dry and Handle Dyed Eggs Safely
After you’ve carefully dipped and rotated your eggs for an even color, the next step is to let them dry completely to avoid smudges. Place your eggs on a paper towel or drying rack for at least 30 minutes to guarantee dried eggs won’t smear.
When handling your dyed eggs, follow these tips to keep them pristine and prevent staining:
- Use tongs or a slotted spoon to gently lift eggs, minimizing the risk of cracks or damage.
- Wear disposable gloves to protect your hands from dye stains during handling.
- Store dried eggs in an egg carton or on a plate covered with plastic wrap, and keep them refrigerated without stacking to maintain color and avoid breakage.
Add Creative Finishes to Dyed Eggs
To make your dyed eggs truly stand out, you can add creative finishes that bring shine, texture, and unique designs to the surface. After using assorted food colors to create vibrant bases, enhance them by applying a light coat of vegetable oil or clear acrylic spray for shine. Use metallic or glitter pens to draw intricate patterns, or wrap eggs with decorative washi tape before dyeing for distinct borders.
For texture, try dipping eggs in melted paraffin wax or use wax resist techniques prior to dyeing with your chosen food colors.
| Finish Type | Description |
|---|---|
| Shine | Vegetable oil or clear acrylic spray |
| Design Accents | Metallic or glitter pens |
| Pattern Borders | Washi tape or metallic foil before dyeing |
| Texture | Paraffin wax dipping or wax resist designs |
Frequently Asked Questions
How to Dye an Egg With Food Coloring?
You mix hot water, vinegar, and food coloring, then soak a hard-boiled egg in the solution. Let it sit until the color’s vibrant, remove carefully, and let it dry.
Repeat for more colors or layers.
Do You Need Vinegar to Dye Eggs With Food Coloring?
You don’t absolutely need vinegar to dye eggs with food coloring, but adding it helps the colors stick better and become brighter.
It also strengthens the shells, preventing cracks while you dye your eggs.
How Long Do You Let Eggs Sit in Food Coloring?
You should let eggs sit in food coloring for about 5 to 10 minutes to get vibrant, even color.
If you want softer shades, soak them 3 to 5 minutes; longer for deeper hues.
Is It Better to Dye Eggs Cold or Hot?
Want bold colors? Dye your eggs cold to keep shades sharp and shells smooth.
Hot eggs might crack or blur colors, but cooling them first guarantees your masterpiece stays vibrant and flawless every time you dip.
Conclusion
Now that you know how to dye eggs with food dye in just five easy steps, are you ready to add a splash of color to your celebration? With simple supplies and a bit of creativity, you can turn plain eggs into vibrant works of art.
Remember to handle your dyed eggs carefully and have fun experimenting with different colors and finishes. Using food dye for egg coloring is a fun and safe way to create beautiful designs.
So, why wait? Grab your supplies and start dyeing eggs with food dye today!